And here were are with part two of my tips on garage sales, this time from the perspective of a buyer. So let's just dive right into things, shall we?
1. Dress the part.
The most important thing to remember, and the one that is just basic common sense, is to dress for the weather. Watch a weather report the night before. Simple, right? Wear something comfortable and shoes that you can walk around in for some time comfortably. You can't go wrong with sunscreen, either.
Second thing to remember, and this might seem a little iffy, but it works: Wear your "poor" clothes. I know, sounds a little shady, right? I don't mean you have to look like a slob, but you honestly can't go wrong looking just a little shabby. Here is the thing: when you roll up in your Lexus wearing something that is visibly pricier (something branded, for example, nice jewelry, looking super "put together") people are not going to be as willing to negotiate their prices with you. If you look like you can afford what ever it is they are asking, why should they be willing to go any lower?
2. Do your research.
There are a few ways to do this. Craigslist is probably the simplest method these days. Not everyone lists their sale, but it is usually good for a few leads and sometime people will post pictures, that way you have an idea what it is you can expect. You can also check the classified ads in your local papers. Some places will now actually have these online as well.
3. Carry plenty of change and small bills.
This just makes things easier for everyone.
4. Be willing to haggle.
I can impress this enough. You won't know if they will go lower if you don't ask. The worst they can say is no.
5. Shop with a partner.
This has a number of benefits. They can watch out for sale signs while you drive. Swap lists of what you are each looking for. Two sets of eyes are better than one. Sometimes they might spot something that you have missed. It's helpful.
6. Have some idea of what you are looking for, and what you are willing to pay for it.
Make a list if you have to. This way you are less likely to overspend when you are caught up in the moment.
7. Take a cooler... and a first aid kit!
This might seem silly, but it's nice to have along. Drinks, snacks, whatever keeps you going so you can do more shopping!! And a first aid kit may come in handy. You never know when someone might get a cut, or a splinter (or have their hand slammed in the car door, long story).
These are just a few basics, if you have any other tips and tricks please share them below in the comments!
Tuesday, July 17, 2012

Monday, July 16, 2012
Handy Dandy Tips: Hosting a Garage Sale
Growing up, going to garage sales was something we did quite often. In junior high I even had a summer school class where we would all pile in the bus and go to garage sales on Fridays. So I think its safe to say that I have been shopping at garage sales for most of my life, in fact, any one who knows my family, particularly my mom's side of the family, would have no trouble agreeing with me when I say that garage sales are in my blood.

This past weekend, Deven and I hit a few garage sales. It was probably the first time I had been on a dedicated trip for garage sales in years, but really got me thinking about what you could do to hold a really successful garage sale. These are a few of the things that I have come up with, but if you have any others, please feel free to leave them in the comments below!
1. Advertise!
My top suggestion for advertising your garage sale would be craigslist. It's free and it's easy. Clearly list the dates and times of the sale and provide an address. If your house is hard to find, provide some simple directions.
One thing I would really recommend is DO NOT OVERSELL your sale. Don't say it's a huge, multi-family sale when it isn't. Be realistic about the size of your sale. Nothing irritates me more than some one telling me the sale is huge and I show up to find maybe three tables and a couple of larger items. That isn't huge. A small sale is ok, as long as I'm not expecting something bigger.
If your sale is a smaller one, don't be discouraged. In your ad, list some of the items you have available. Upload photos as well. If people are looking for something specific, you might have just what they want! I will still stop at small sales because you never know what you might find.
2. Signage.
Post signs to help direct people to your sale. This is often how I find most of the garage sales I go to. Just like with the advertising, provide an address and dates of the sale. Make it neat and easy to read!
Following your garage sale, remove the signs from where you posted them. This may seem silly, but its frustrating for people to track down a sale only to find out it happened the week before. Don't be that jerk.
3. Combine forces with a friend.
Maybe your house is way out in the middle of nowhere or you really only have a few items to sell. Pair up with a friend. We have done this before with some friends who were having a neighborhood garage sale and had much better luck than we did just on our own.
4. Stay organized!
This covers quite a few different facets. First and foremost, make sure you have enough change and a place to keep it. We used a lock box Deven had, but really any kind of small box will work, particularly if it has dividers for the change.
Particularly when you are pairing up with a friend or other family members it can be helpful to keep a notebook with you so you can keep track of how much each person is making. Some people use different colored tags on their items or put their initials on the tags and remove the tag to stick in the notebook when the item is sold. Use whatever method works best for you.
As far as the items you are selling go, try to keep like items together. This isn't always totally feasible, but do your best. It makes it much easier for your shoppers. Place items on tables when you can as opposed to the ground.
5. Clean your items.
No one wants to dig through a big pile of items that look like they have been in your garage for years or buried under a pile of leaves in your yard for who knows how long. A least take the time to dust things off or wipe them down. You don't have to go into full on restoration mode here (in fact, where antiques are concerned, you shouldn't do that), but just clean off visible dirt and dust. A little dirt is not going to discourage a hardcore garage sale shopper from digging in, but it might scare away some more casual shoppers.
6. Don't fancy up items so that you can ask a higher price.
This is pretty self explanatory. Many people going to garage sales are looking for items they can upcycle or use in some DIY decor. At one sale I picked up a painted shelf and asked about it. The homeowner told me $12 and said that his wife had just painted it the night before. The paint was alright, but was A) fresh and B) flat finish. If I had liked the shelf for the paint it would have totally chipped before it ever got into the door of our house. As it was, I wanted the shelf to paint myself and would have wanted it for far less than they were asking. Not worth it. Leave your items as is.
7. Be realistic with pricing.
With shows like Antiques Roadshow, American Pickers, Pawn Stars and similar shows all over TV and websites like eBay, a lot of people feel very savvy about what their junk is worth. Unfortunately, the truth is this: it's worth what people are willing to pay for it. I go to garage sales looking for deals. I'm not expecting to pay what someone on TV says some piece of glassware is worth. Unless you have had an antiques appraiser look at your items and can offer me proof that an item is worth a certain amount, I'm not going to consider paying a premium on something. Just telling me that you saw the same thing sell on some show for a certain amount is not good enough for me. Sorry.
You should be willing to negotiate most of your prices. If an item is too dear for you to sell at a somewhat lower price, don't sell it at your garage sale.
Keep in mind, this is a garage sale. You are probably not going to make enough to fund your next family vacation. Be real.
Keep an eye out later this week and I will post some tips for you garage sale shoppers!

This past weekend, Deven and I hit a few garage sales. It was probably the first time I had been on a dedicated trip for garage sales in years, but really got me thinking about what you could do to hold a really successful garage sale. These are a few of the things that I have come up with, but if you have any others, please feel free to leave them in the comments below!
1. Advertise!
My top suggestion for advertising your garage sale would be craigslist. It's free and it's easy. Clearly list the dates and times of the sale and provide an address. If your house is hard to find, provide some simple directions.
One thing I would really recommend is DO NOT OVERSELL your sale. Don't say it's a huge, multi-family sale when it isn't. Be realistic about the size of your sale. Nothing irritates me more than some one telling me the sale is huge and I show up to find maybe three tables and a couple of larger items. That isn't huge. A small sale is ok, as long as I'm not expecting something bigger.
If your sale is a smaller one, don't be discouraged. In your ad, list some of the items you have available. Upload photos as well. If people are looking for something specific, you might have just what they want! I will still stop at small sales because you never know what you might find.
2. Signage.
Post signs to help direct people to your sale. This is often how I find most of the garage sales I go to. Just like with the advertising, provide an address and dates of the sale. Make it neat and easy to read!
Following your garage sale, remove the signs from where you posted them. This may seem silly, but its frustrating for people to track down a sale only to find out it happened the week before. Don't be that jerk.
3. Combine forces with a friend.
Maybe your house is way out in the middle of nowhere or you really only have a few items to sell. Pair up with a friend. We have done this before with some friends who were having a neighborhood garage sale and had much better luck than we did just on our own.
4. Stay organized!
This covers quite a few different facets. First and foremost, make sure you have enough change and a place to keep it. We used a lock box Deven had, but really any kind of small box will work, particularly if it has dividers for the change.
Particularly when you are pairing up with a friend or other family members it can be helpful to keep a notebook with you so you can keep track of how much each person is making. Some people use different colored tags on their items or put their initials on the tags and remove the tag to stick in the notebook when the item is sold. Use whatever method works best for you.
As far as the items you are selling go, try to keep like items together. This isn't always totally feasible, but do your best. It makes it much easier for your shoppers. Place items on tables when you can as opposed to the ground.
5. Clean your items.
No one wants to dig through a big pile of items that look like they have been in your garage for years or buried under a pile of leaves in your yard for who knows how long. A least take the time to dust things off or wipe them down. You don't have to go into full on restoration mode here (in fact, where antiques are concerned, you shouldn't do that), but just clean off visible dirt and dust. A little dirt is not going to discourage a hardcore garage sale shopper from digging in, but it might scare away some more casual shoppers.
6. Don't fancy up items so that you can ask a higher price.
This is pretty self explanatory. Many people going to garage sales are looking for items they can upcycle or use in some DIY decor. At one sale I picked up a painted shelf and asked about it. The homeowner told me $12 and said that his wife had just painted it the night before. The paint was alright, but was A) fresh and B) flat finish. If I had liked the shelf for the paint it would have totally chipped before it ever got into the door of our house. As it was, I wanted the shelf to paint myself and would have wanted it for far less than they were asking. Not worth it. Leave your items as is.
7. Be realistic with pricing.
With shows like Antiques Roadshow, American Pickers, Pawn Stars and similar shows all over TV and websites like eBay, a lot of people feel very savvy about what their junk is worth. Unfortunately, the truth is this: it's worth what people are willing to pay for it. I go to garage sales looking for deals. I'm not expecting to pay what someone on TV says some piece of glassware is worth. Unless you have had an antiques appraiser look at your items and can offer me proof that an item is worth a certain amount, I'm not going to consider paying a premium on something. Just telling me that you saw the same thing sell on some show for a certain amount is not good enough for me. Sorry.
You should be willing to negotiate most of your prices. If an item is too dear for you to sell at a somewhat lower price, don't sell it at your garage sale.
Keep in mind, this is a garage sale. You are probably not going to make enough to fund your next family vacation. Be real.
Keep an eye out later this week and I will post some tips for you garage sale shoppers!
Sunday, July 15, 2012
Dining on a Dime: Chicken Pesto English Muffins
This one is a favorite in our house. It's incredibly easy to make and I try to keep the ingredients on hand for it. I actually "borrowed" the recipe from my friend Monica (she is a better cook than I am, so I borrow her cooking ideas often).
What you will need:
Step 1: Cook your chicken. I usually season mine with a little salt, pepper and garlic, but that is entirely up to you and your tastes.

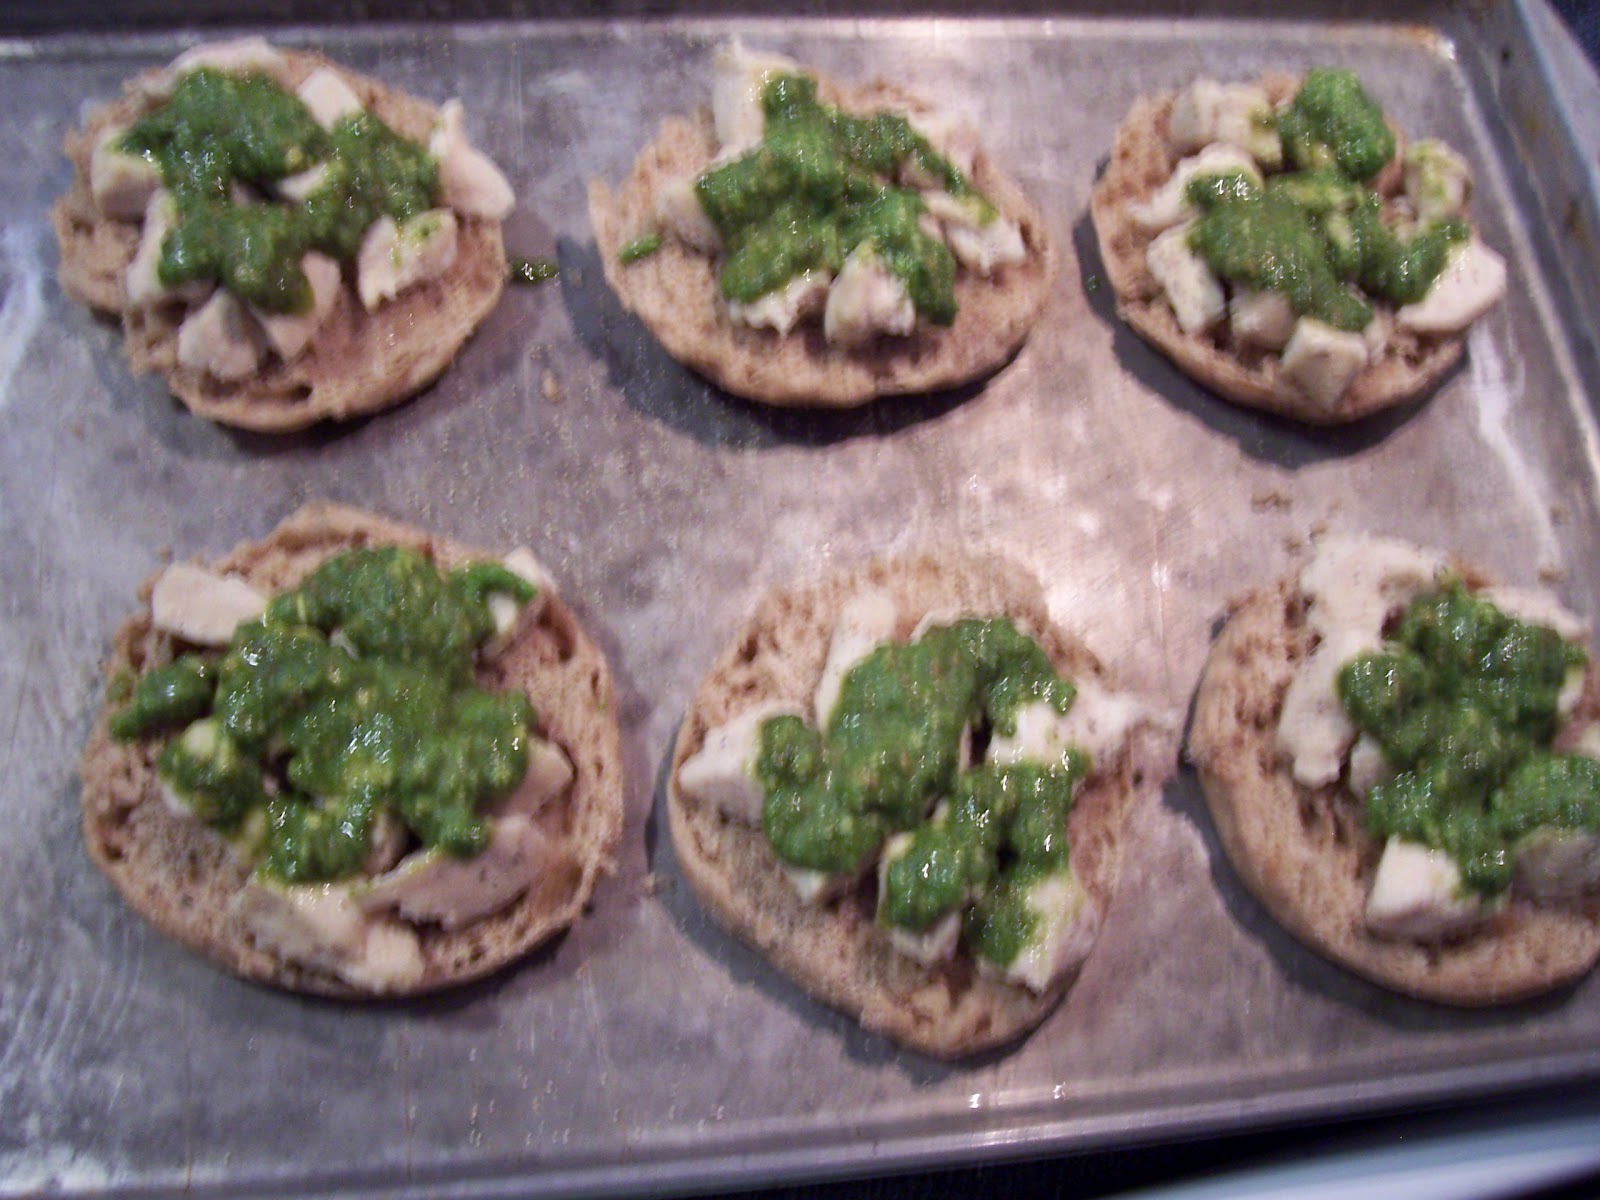
Step 2: While your chicken is cooking through, slice your English muffins, if necessary, and place them on a baking sheet...

...and slice your mozzarella.

Step 3: Once the chicken is thoroughly cooked, place on your English muffin halves and top with a spoonful of pesto. You can make your own pesto if you like, its fairly simple, but since my basil did not survive the last spring frost, I just buy a big jar from Sam's and have been pretty happy with that.

Step 4. Add a slice of mozzarella to each. Top with fresh basil if you like. Thanks to my friend Shelby, I actually had a little bit this time.

Step 5: Place your pan under the broiler on low until the cheese melts and starts to brown. Remove. Serve.

That's it! So easy and so tasty!!
What you will need:
- Chicken breast, cut into small pieces
- English muffins
- Pesto
- Fresh mozzarella
- Fresh basil (optional)
Step 1: Cook your chicken. I usually season mine with a little salt, pepper and garlic, but that is entirely up to you and your tastes.

Step 2: While your chicken is cooking through, slice your English muffins, if necessary, and place them on a baking sheet...

...and slice your mozzarella.

Step 3: Once the chicken is thoroughly cooked, place on your English muffin halves and top with a spoonful of pesto. You can make your own pesto if you like, its fairly simple, but since my basil did not survive the last spring frost, I just buy a big jar from Sam's and have been pretty happy with that.
Step 4. Add a slice of mozzarella to each. Top with fresh basil if you like. Thanks to my friend Shelby, I actually had a little bit this time.

Step 5: Place your pan under the broiler on low until the cheese melts and starts to brown. Remove. Serve.
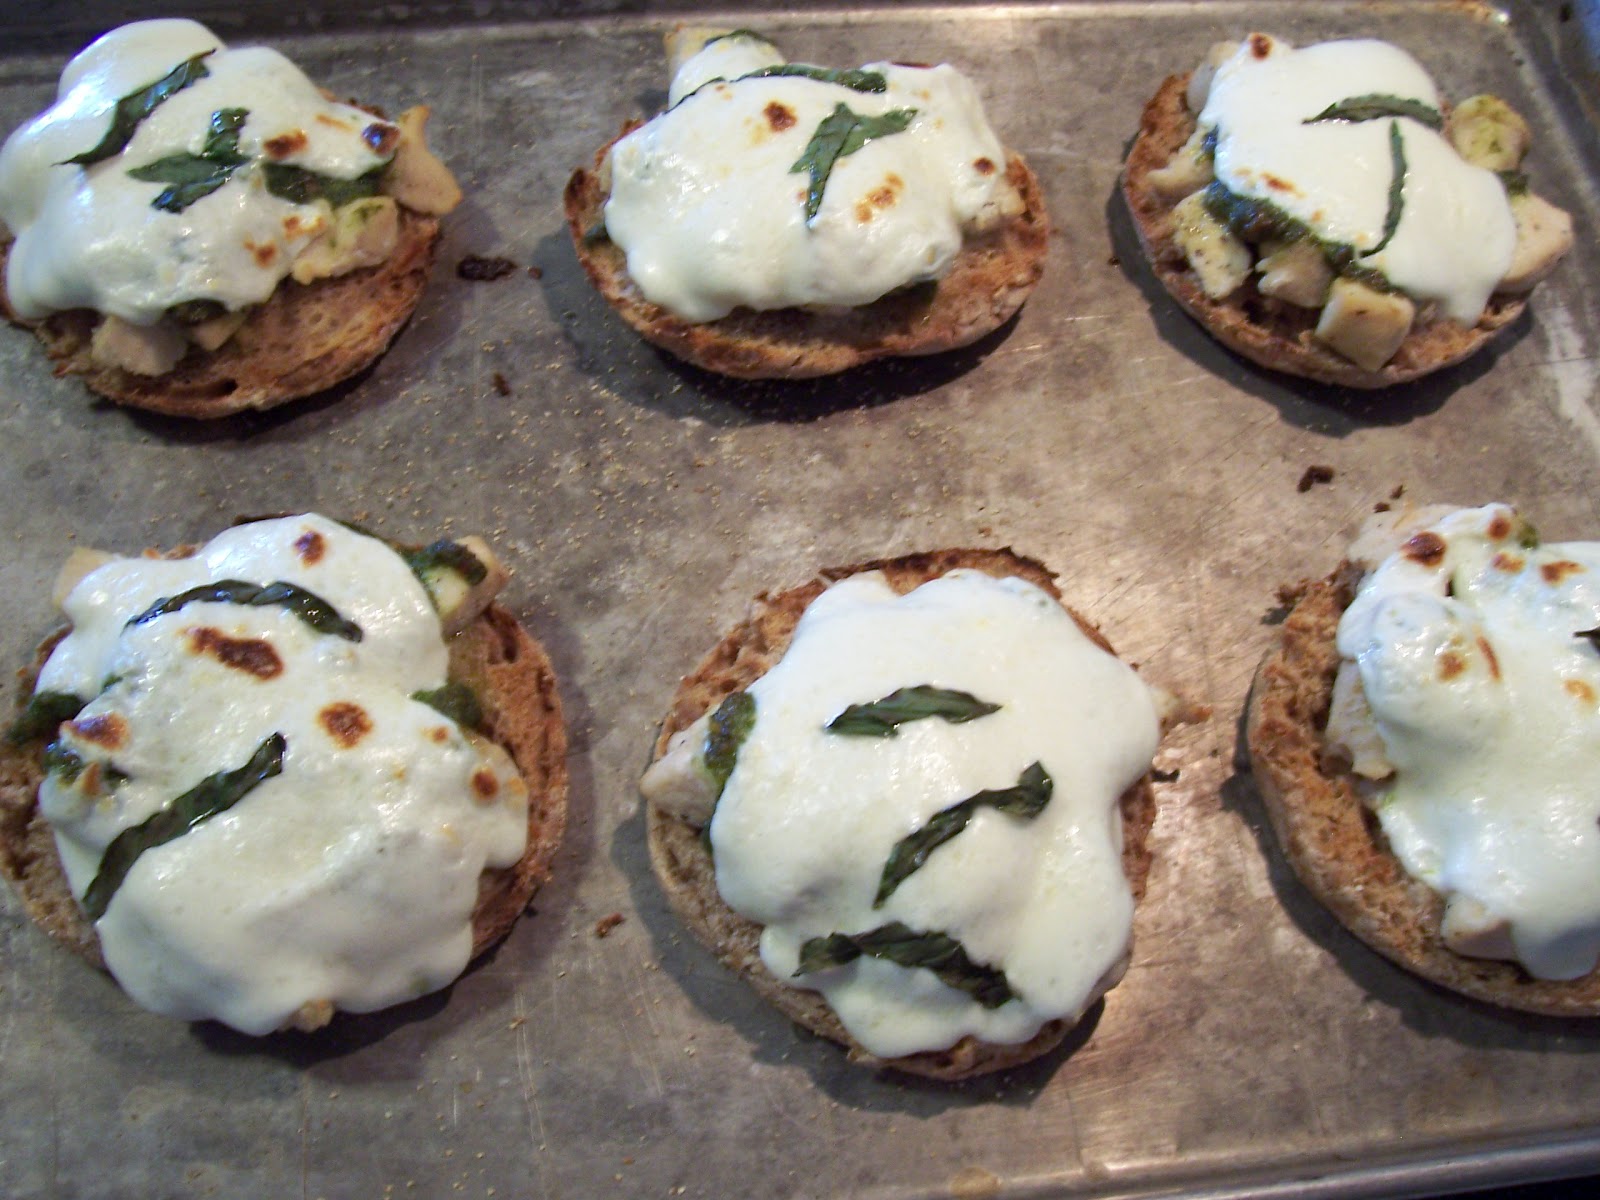
That's it! So easy and so tasty!!
Monday, July 9, 2012
Handy Dandy Tips: Pinterest Scrub Test
I'm not ashamed to say that I spend a fair amount of time on Pinterest. In fact, that might be a bit of an understatement. I'm pretty much addicted.
If you spend much time on Pinterest yourself you have probably run across pins featuring old jelly roll pans miraculously restored to practically new. I had and being in possession of a least one shady looking jelly roll pan myself I decided I would give this "miracle" a try. (You can check out the post that inspired my test here: One Good Thing by Jillee.)
You will need:
Here is what I started with:


And after scrubbing and scrubbing and scrubbing, this is what I ended up with:


Better, but clearly not perfect, and definitely not as good as the examples I was seeing all over Pinterest. My verdict? It works, but I just don't have the time or desire (or, let's face it, the upper body strength) to scrub for the necessary amount of time to really get my pan sparkling. Ultimately, I decided that I don't really show the pans off to my guests anyway and figure this is something I can really forgo in the future.
Another use I have seen for the same mixture listed above is to clean the white residue off of black plastic cooking utensils. Here are mine before:

And after:

Again, better, but not perfect. However, this one is one I'm more likely to continue doing. I use these all the time and would prefer they look clean when they actually are.
So it turns out: Pinterest does not always have all the answers. I know. I'm shocked too. That's to say this didn't work, but it certainly wasn't the miracle part of me was expecting. Let me know if you try it out with better results!
If you spend much time on Pinterest yourself you have probably run across pins featuring old jelly roll pans miraculously restored to practically new. I had and being in possession of a least one shady looking jelly roll pan myself I decided I would give this "miracle" a try. (You can check out the post that inspired my test here: One Good Thing by Jillee.)
You will need:
- Baking soda
- Hydrogen peroxide
- Tea Tree Oil (optional)
Here is what I started with:


And after scrubbing and scrubbing and scrubbing, this is what I ended up with:


Better, but clearly not perfect, and definitely not as good as the examples I was seeing all over Pinterest. My verdict? It works, but I just don't have the time or desire (or, let's face it, the upper body strength) to scrub for the necessary amount of time to really get my pan sparkling. Ultimately, I decided that I don't really show the pans off to my guests anyway and figure this is something I can really forgo in the future.
Another use I have seen for the same mixture listed above is to clean the white residue off of black plastic cooking utensils. Here are mine before:

And after:

Again, better, but not perfect. However, this one is one I'm more likely to continue doing. I use these all the time and would prefer they look clean when they actually are.
So it turns out: Pinterest does not always have all the answers. I know. I'm shocked too. That's to say this didn't work, but it certainly wasn't the miracle part of me was expecting. Let me know if you try it out with better results!
Thursday, July 5, 2012
Hooray for Crafting! Denim Rosettes

As requested! What you will need:
- Scissors
- Hot glue
- A square of denim, edges rounded (or any other fabric really, felt also works well) any size, depending on how big you want your rosette

Step 1: Starting on an outside edge, cut your denim square into a spiral.

Step 2: Start with the outside end of your spiral and start rolling towards the center. Secure with hot glue as needed.


Step 3: When you get to the end the very end goes very neatly over the bottom of the rosette. Secure with glue and you are done!


Tuesday, July 3, 2012
Dining on a Dime: Sweet & Spicy Turkey Chili
So with temps here at 100+ for more than a week now, chili obviously wouldn't be anyone's number one choice, but considering that this is a meal I usually have the ingredients on hand for.
You will need:

Step 2: Add corn, beans and tomato sauce. I usually use a little water (about 1/3 of the can) to rinse out the tomato sauce cans and add a little extra liquid to the chili.

Step 3: Add your chili powder and red pepper flakes. Stir. I don't use any certain amount, just taste it and put in what tastes good. I like a little heat with my chili, so I add quite a few red pepper flakes.

Step 4: Add your brown sugar. Stir. Again, I have not particular amount that I use. I like it fairly sweet (hence the title of the recipe.) Just eyeball it and stop adding when it tastes good to you.

You will need:
- 1 to 1.5 pounds of ground turkey (You can use beef if you prefer. I try to use extra lean turkey to keep the calories down.)
- 1 can of corn, drained (Optional)
- 1 30oz can of pinto beans, drained and rinsed
- 2 15oz cans of tomato sauce
- Chili powder, red pepper flakes, and brown sugar to tase

Step 2: Add corn, beans and tomato sauce. I usually use a little water (about 1/3 of the can) to rinse out the tomato sauce cans and add a little extra liquid to the chili.

Step 3: Add your chili powder and red pepper flakes. Stir. I don't use any certain amount, just taste it and put in what tastes good. I like a little heat with my chili, so I add quite a few red pepper flakes.


Step 5: Let simmer until hot. Serve with cheese, sour cream, cornbread, whatever you like.
As a bonus, if you want to make the best cornbread I've ever had, its super easy. Simply follow the directions on one box of Jiffy corn muffin mix and one Jiffy cake mix, combine and bake. So yummy. This time around I was out of the eggs called for, so I substituted applesauce. It wasn't bad, but definitely had a little bit of applesauce taste to it and it was SUPER crumbly. It works, but stick with the eggs.
Shopping is Fun!
Hey all! I promise I have at least two new posts lined up that will hopefully be up in the next 24 to 48 hours, but in the meantime, scoot on over to my Facebook page here and check out my new store! There isn't much up yet, but it's a work in progress and I promise some much better pictures are coming, big thanks to Wyatt Photography!
Subscribe to:
Posts (Atom)